Showing posts with label knitted vest. Show all posts

Friday, September 14, 2012

Easy Breezy Vest

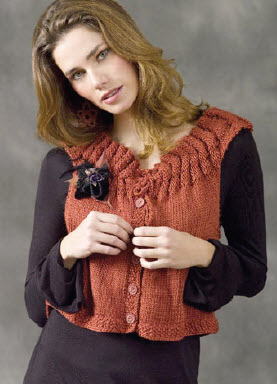
This one piece vest pattern from Berroco would be an excellent first "clothing" project for those that have just started knitting and want to venture out!


SIZES

Directions are for women's size X-Small. Changes for sizes Small, Medium, Large, 1X and 2X are in

parentheses


FINSHED MEASUREMENTS

Width - 36(40-44-48-52-56)"

Length - 28(28-29-29-30-30½)"

Note: There is quite a bit of overlap on the fronts of this garment, so each size will fit multiple sizes
MATERIALS5(5-6-7-7-8) Hanks
BERROCO CAPTIVA (50 grs), #5503 Silver Coin 29" Length circular knitting needle, size 11 (8.00 mm) OR SIZE TO OBTAIN GAUGE2 St markers


GAUGE
12 sts = 4"; 18 rows = 4" in Seed St

TO SAVE TIME, TAKE TIME TO CHECK GAUGE

NOTE
This garment is worked in one piece from right front edge to left front edge

SEED STITCH
(Even number of sts)

Row 1 (RS):

* K1, p1, rep from * across.

Row 2:

* P1, k1, rep from * across. Rep these 2 rows for Seed St


VEST

With circular needle, cast on 84(84-88-88-90-92) sts. DO NOT join.Row 1 (RS):


Working in Seed St, work 18 sts, place marker, work 24(24-26-26-28-30) sts, place marker,
work to end. Work even in Seed St until piece measures 12(13-14-15-16-17)" from beg, end on WS.
Right Armhole: Next Row (RS):

Work to first marker, sl marker, bind off 24(24-26-26-28-30) sts, sl
marker, work to end.
 

Following Row:

Work in Seed St casting on 24(24-26-26-28-30) sts between markers over sts bound off on
previous row. Work even until piece measures 24(27-30-33-36-39)" from beg, end on WS.


Left Armhole:

Work same as right armhole. Work even until piece measures 36(40-44-48-52-56)" from beg, end on WS. Bind off

.


Monday, March 12, 2012

Warm Up that Cold Shoulder!

This fun fur shoulder vest pattern from TSC Yarns, should keep that small chill away...


SIZES Small (Medium, Large, XL)


MATERIALS
3 (4, 5, 5) balls Filatura Di Crosa CINCILLA, 52% wool, 34% acrylic, 14% polyamide (1.75oz/50g; 38yds/35m) in color #06 brick
One pair size 15 (10mm) needle OR SIZE TO OBTAIN GAUGE
Yarn needle

KNITTED MEASUREMENTS
Bust 30 (34, 36, 40)”/76 (86.5, 91.5,101.5) cm
Length 8 (8, 10, 10)”/20.5 (20.5,25.5, 25.5) cm

GAUGE 8 sts and 10 rows = 4”/10 cm in K1, p1 rib
TAKE TIME TO CHECK GAUGE

PATTERN STITCHES

K1, p1 rib (multiple of 2 sts + 1)
Row 1 (RS) K1, [p1, k1] to end.
Row 2 P1, [k1, p1] to end.
Repeat Rows 1-2 for K1, p1, rib.

VEST
Cast on 15 (15, 21, 21) sts.
Work in K1, p1 rib until piece measures 60 (68, 72, 80)” from beginning, end with a WS row.
Bind off.

FINISHING
Sew cast-on and bind-off rows together to form a loop. Mark 5 (5½, 6, 6½)” either side of seam along
one long edge for upper edge of Back (A). With RS
facing, flatten loop in half, keeping seam centered.
Mark center 10 (11, 12, 13)” along long edge of opposite half of loop (B) to correspond with marked

upper edge of Back. Sew marked edges together.
Seamed section will form the Back, unsewn edges will
form the Armholes and remaining section will form the
Collar and Fronts.Weave in ends.

Wednesday, June 1, 2011

Diagonally Knitted Vest

This vest/shell is "da bomb!" Knitting diagonally, with this yarn will cause heads to turn!

Diagonal knitting is a wonderful way to use up odds and ends, as gauges
don’t need to match exactly and neither do back, front and
sleeves. Our sample shell uses lots of different size 3 yarns for a
fun, gradated look. Here are some hints for succesfully knitting on
the diagonal:
• Garter stitch is the easiest, because the stitch to row ratio is
1:2. A typical garter stitch gauge might be 4 sts and 8 rows
per inch. To make a square (90⁰) angle, one stitch at each end
should be increased every two rows (every other row).
• Stockinette is tougher, as the stitch to row ratio is closer to
2:3. A typical stockinette stitch gauge might be 4 sts and 6
rows per inch. If increases were made every other row as
for garter, the angle would be wider than 90⁰, and any seam
would twist around the body instead of being vertical.

So forstockinette stitch, increase at each edge for two consecutive
rows, then work one row even with no shaping. That gives a
six row repeat:
Row 1: K and increase.
Row 2: P and increase.
Row 3: K.
Row 4: P and increase.
Row 5: K and increase.
Row 6: P and increase.
• Make increases in the first stitch, and in the next to last stitch
to balance them. Make increases by knitting in the front, then
in the back of each stitch.
• Always measure along the selvedge edge, not from the corner
to the needle.
• Once you have reached the dimension you want, shape
the other corners by decreasing: work ssk or ssp at beg of
appropriate rows and k 2 tog or p 2 tog at end of appropriate
rows, depending on whether you are working garter or
stockinette stitch.
• If you want a piece that is longer than it is wide, work to
the width, then continue to increase at one end while you
decrease at the other end. Do this for as long as the piece
needs to be, then begin decreasing at both ends. Once you
begin to increase at one end and decrease at the other, even
if you are working stockinette stitch you can work every other
row without throwing the corners out of square. Whether you
increase or decrease at the beginning or end will determine
what direction the stripes will run, which becomes important
when trying to match fronts and backs.

Sizes: S (M, L, XL)
Finished bust approx 40 (44, 48, 52)”
Body is slightly oversized to allow for drape.

Materials: approx 700 (800, 900, 1000) yds size 3 & 4 yarns,
plus 80 yds trim yarn
Used here a variety of Prism size 3 & 4 yarns, including:
Dazzle,Super Dazzle, Tulle, Trieste, Frost, Azalea, Bon Bon, Tencel, Pinot, Flirt, Cleo, Sushine
In colors that include:
Harvest, Blue Lagoon, Captiva, Orchard, Mojave, Arroyo
Needles size 8 or size to get gauge
Crochet hook size E & F
Gauge: In garter st alternating 3 yarns of 1 row each:
18 sts & 34 rows = 4”

Note: Gradated color blending is easy. Before beginning, lay all yarns
out lightest to darkest. If you have purchased a kit, the skeins are
already labeled A, B, C, etc. Label your own custom choice as needed.
3 different yarns are used for 1 row each:
CO with A; drop A and attach B; k 1 row B; drop B and attach C; k 1 row
C and A is waiting for next row. To keep yarns from tangling, place one
ball on either side and one ball between your legs, and watch when
you turn the work: one direction tangles, the other direction does
not. Color gradation is achieved by working A, B, C for a few inches,
then B, C, D, then C, D, E and so on, arranging colors loosely from light
to dark. Work front as mirror image of back (begin from other corner).
Work back first, then work front approximating color placement—it
doesn’t have to match exactly. Work more rows of yarns with more
yardage, even if it means that sometimes a yarn is used for longer
than its rotation. As you work, check remaining amounts of yarn
and make any adjustments. Don’t worry about breaking the rotation
and repeating a yarn if needed—we did! We had 9 different yarns,
labeled A through I. Adjust measurements below if you have more
or fewer yarns.

Back: With A, CO 3 sts. With B, inc 1 in first st, k to end. With C,
inc 1 in first st, k to end. Inc in the first st on all rows. Make all
measurements along selvedge edge, not from corner to needle.
Work A, B, C to approx 6 (7, 8, 9)”, then drop A and add D. Work B,
C, D to approx 12”, then drop B and add E.
Work C, D, E to approx 17”.
Work D, E, F to 20 (22, 24, 26)”, then cont on D, E, F, beg dec: work
to end of row, k 2 tog last 2 sts. Measuring from 1st decrease, cont in
D, E, F to approx 3” from corner.
Work E, F, G to approx 8”.
Work F, G, H for to approx 14”.
Work G, H, I to approx 20 (22, 24, 26)”: When 1 st remains, fasten
off.
Front: Repeat as for back.

Finishing: Sew shoulder seams, leaving approx 7 (8, 8½, 9)” open for
neck. Sew side seams, leaving approximately 3-4” open at hem for
side slit. With trim yarn, work 1 row sc and 1 row rev sc around hem
and slits, and around neck and armhole openings.

Saturday, April 16, 2011

Vintage Vest

This vest will look great with a long ruffle shirt and skinny jeans.


SIZES Directions are for women’s size X-Small. Changes for sizes Small, Medium, Large, 1X and 2X are in parentheses


FINISHED MEASUREMENTS Bust (closed) – 32(36-40-44-48-52)” Length – 17½(18-19-19½-20½-20½)” MATERIALS 2(2-3-3-3-3) Balls BERROCO VINTAGE DK (100 grs), #2184 Sloe Berry (MC) and 1 ball #2105 Oats (CC) Straight knitting needles, size 5 (3.75 mm) OR SIZE TO OBTAIN GAUGE Two 1” buttons Optional: 1 metal snap

GAUGE 23 sts = 4”; 32 rows = 4” in St st TO SAVE TIME, TAKE TIME TO CHECK GAUGE


BACK With straight needles, using MC, cast on 80(92-104-114-126-138) sts. Work even in St st for 1(1-1½-1½-2- 2)”, end on WS. Inc Row (RS): K1, M1k, k to last st, M1k, k1 – 82(94-106-116-128-140) sts. Rep this inc every 1” 5 times more – 92(104-116-126-138-150) sts. Work even until piece measures 8(8-8½-8½-9-9)” from beg, end on WS. Shape Armholes: Bind off 5(5-6-7-9-10) sts at beg of the next 2 rows, then 2 sts at beg of the following 2 rows – 78(90-100-108-116-126) sts. Dec Row (RS): K1, SSK, k to last 3 sts, k2 tog, k1 – 76(88-98-106-114-124) sts. Rep this dec every RS row 3(9-12-13-14-16) times more – 70(70-74-80-86-92) sts. Work even until armholes measure 8½(9-9½- 10-10½-10½)”, end on WS. Shape Shoulders: Bind off 5(5-5-5-7-8) sts at beg of the next 4(4-8-2-4-2) rows, then 4(4-0-6-6-7) sts at beg of the next 4(4-0-6-4-6) rows. Bind off remaining 34 sts for back neck.

LEFT FRONT With straight needles, using MC, cast on 40(46-52-57-63-69) sts. Row 1 (RS): K to last st, pick up horizontal strand between the st just worked and next st and place this strand on RH needle, sl the last st. Row 2: P slipped st and picked-up strand tog TBL, p to end. Work even in pat as established until piece measures ½” from beg, end on WS. Buttonhole Row (RS): K to last 12 sts, bind off 2 sts, k to last 5 sts, bind off 2 sts, work to end. Next Row: Work in pat as established, cast on 2 sts over each pair of sts bound off on previous row. Work even until piece measures 1(1-1½-1½-2-2)” from beg, end on WS. Shape Side and Neck: Next Row (RS): K1, M1k (side inc), k to last 3 sts, k2 tog (neck dec), work last 2 sts in pat as established. Working incs and decs in this manner, continue to inc at side edge every ¾” 5 times more. AT THE SAME TIME, continue to dec at neck edge every 1” 16 times more. When side incs have been completed and piece measures 8(8-8½-8½- 9-9)” from beg, end on WS. Continuing to work neck decs, shape armhole same as back, working decs as k1, SSK. When all armhole and neck decs have been completed, work even on 18(18-20-23-26-29) sts until armhole measures 8½(9-9½-10-10½-10½)”, end on WS. Bind off 5(5-5-5-7-8) sts at armhole edge 2(2-4-1-2-1) times, then 4(4-0-6-6-7) sts 2(2-0-3-2-3) times for shoulder.

RIGHT FRONT With straight needles, using MC, cast on 40(46-52-57-63-69) sts. Knit 1 row, end on RS. Row 1 (WS): P to last st, pick up horizontal strand between last st worked and next st and place this strand on RH needle, sl 1. Row 2 (RS): K2 tog TBL, k to end. Working in pat as established, complete to correspond to left front, reversing all shaping and omitting buttonholes. Work neck decs at beg of RS rows as work 2 sts in pat as established, SSK. Work side incs at end of RS rows as M1k, k1. Bind off for armhole on WS rows. Work armhole decs at end of RS rows as k2 tog, k1. Bind off for shoulder on WS rows.

FINISHING Sew shoulder and side seams. Edging: With RS facing, using crochet hook and CC, join yarn at left shoulder seam with a sl st. * Sc on edge of vest, skip ¼" on vest, work 5 dc’s in same spot on edge of vest (shell made), rep from * along left front, lower, right front, then back edges of vest, skip ¼" on edge of vest, join with a sl st in first sc. Fasten off. Lap left front over right front and sew on buttons.

Saturday, October 30, 2010

Hooded Vest...Talk About Versatility!

This versatile hooded vest can be worn belted or loose, layered and open. Either way, this cozy layer will be a go-to garment this winter.

Shown in size Large

SIZES
Directions are for women’s size X-Small. Changes for sizes Small, Medium, Large, 1X and 2X are in parentheses

FINISHED MEASUREMENTS
Bust (closed) – 32(36-40-44-48-52)”
Length – 24(24-25-25½-26-26½)” (Not including hood)

MATERIALS
7(8-9-10-11-12) Balls BERROCO BLACKSTONE TWEED (50 grs), #2646 Salt Water
Alternate color: #2607 Wintery Mix.
Straight knitting needles, size 7 (4.50 mm) OR SIZE TO OBTAIN GAUGE
2 St markers
2 St holders

GAUGE
18 sts = 4”; 25 rows = 4” in St st
22 sts = 4”; 25 rows = 4” in Pat St
TO SAVE TIME, TAKE TIME TO CHECK GAUGE

PATTERN STITCH (Even number of sts)
Row 1 (RS): * K in front and back of next st, p1, rep from * across.
Row 2: * K1, p2 tog, rep from * across.
Row 3: * K1, p1, rep from * across.
Row 4 (WS): Rep Row 1.
Row 5: Rep Row 2.
Row 6: Rep Row 3.
Rep these 6 rows for Pat St.

BACK
With straight needles, cast on 103(117-129-142-155-169) sts.

Ribbing: Row 1 (RS): K1, * p1, k1, rep from * across.
Row 2: P1, * k1, p1, rep from * across. Rep these 2 rows until piece measures 1½”, end on RS. P the next row, dec 30(36-38-44-46-52) sts across – 73(81-91-99-109-117) sts. Work even in St st until piece
measures 4(4-4½ -4½-5-5)” from beg, end on WS.
Dec Row (RS): K1, k2 tog, k to last 3 sts, SSK, k1 – 71(79-89-97-107-115) sts. Rep this dec every 2¾” twice more – 67(75-85-93-103-111) sts. Work even until piece measures 11½(11½-12-12-12½-12½)” from
beg, end on WS.
Inc Row (RS): K1, M1k, k to last st, M1k, k1 – 69(77-87-95-105-113) sts. Rep this inc every 1½” twice more – 73(81-91-99-109-117) sts. Work even until piece measures 15½(15½-16-16-16½-16½)” from beg, end on WS.
Shape Armholes: Bind off 6(6-7-7-8-8) sts at beg of the next 2 rows, then 2 sts at beg of the next 2 rows – 57(65-73-81-89-97) sts.
Dec Row (RS): K3, k2 tog, k to last 5 sts, SSK, k3 – 55(63-71-79-87-95) sts. Rep this dec every RS row 0(4-6-8-10-11) times more – 55(55-59-63-67-73) sts. Work even until armholes measure 7½(7½-8-8½- 8½-9)”, end on WS.

Shape Shoulders: Bind off 4(4-6-6-6-7) sts at beg of the next 2 rows, then 5(5-5-6-7-8) sts at beg of the
next 4 rows. Bind off remaining 27 sts for back neck.

LEFT FRONT
With straight needles, cast on 73(79-85-91-97-103) sts.
Establish Frontband: Row 1 (RS): Work ribbing same as back over 31(37-43-49-55-61) sts, place marker, work Row 1 of Pat St to end.
Row 2: Work Row 2 of Pat St to marker, work ribbing same as back to end. Work even in pat as established until piece measures 1½” from beg, end on RS.
Next Row (WS): Work in Pat St to marker, p to end, dec 8(10-11-13-14-16) sts across – 65(69-74-78-83- 87) sts. Keeping 42 sts at front edge in Pat St and remaining sts in St st, work even until piece measures
4(4-4½-4½-5-5)” from beg, end on WS.
Dec Row (RS): K1, k2 tog, work to end – 64(68-73-77-82-86) sts. Rep this dec every 2¾” twice more – 62(66-71-75-80-84) sts. Work even until piece measures 11½(11½ -12-12-12½-12½)” from beg, end on WS.
Inc Row (RS): K1, M1k, work to end – 63(67-72-76-81-85) sts. Rep this inc every 1½” twice more – 65(69-74-78-83-87) sts. Work even until piece measures 15½(15½-16-16-16½-16½)” from beg, end on WS.
Shape Armhole: Bind off 6(6-7-7-8-8) sts at beg of the next RS row, then 2 sts at beg of the following RS row, end on WS – 57(61-65-69-73-77) sts.
Dec Row (RS): K3, k2 tog, work to end – 56(60-64-68-72-76) sts. Rep this dec every RS row 0(4-6-8-10- 11) times more – 56(58-58-60-62-65) sts. Work even until armhole measures 7½(7½-8-8½-8½-9)”, end on WS.
Shape Shoulder: Bind off 4(4-6-6-6-7) sts at beg of the next RS row, then 5(5-5-6-7-8) sts at beg of the following RS row, end on RS – 47(47-47-48-49-50) sts.
Next Row (WS): Work in Pat St to marker, then sl these 42 sts to holder for hook, p to end – 5(5-5-6-7-8) sts. Bind off.

RIGHT FRONT
Work to correspond to left front, reversing all shaping and placement of Pat St. Work side decs at end of RS rows as SSK, k1. Work side incs at end of RS rows as M1k, k1. Bind off for armhole on WS rows. Work
armhole decs at end of RS rows as SSK, k3. For shoulder, bind off at armhole edge on WS rows twice, end on WS.
Next Row (RS): Work in Pat St to marker, sl these 42 sts to holder for hood, then k to end. Bind off remaining sts on WS.


FINISHING
Sew shoulder seams.
Hood: With RS facing, sl 42 sts from right holder to straight needle, place marker, pick up and k27 sts across back neck edge, place marker, work 42 sts from left holder in Pat St as established – 111 sts.
Next Row (WS): Work in Pat St as established to first marker, p to next marker, inc 7 sts across, work in Pat St as established to end – 118 sts. Keeping 42 sts at each front edge in Pat St as established and
remaining sts in St st, work even until hood measures 10”, end on WS. Bind off. Fold hood in half lengthwise and sew bound-off edge together forming top seam. Sew side seams.

Monday, July 5, 2010

Tied Front Vest

This is a beautiful vest to wear year-round! The pima cotton yarn makes it oh-so-soft!

SIZES
Directions are for women’s size X-Small. Changes for sizes Small, Medium, Large, 1X and 2X are in parentheses.

FINISHED MEASUREMENTS
Bust – 32(36-40-44-48-52)”
Length – 20(20-21-21½-22-22½)” down center back [add 20(20-21-21-22-22)” for tails in front]

MATERIALS
10(11-12-13-14-15) Hanks BERROCO pure pima (50 grs), #2264 Ballet Slipper
Straight knitting needles, size 6 (4.00 mm) OR SIZE TO OBTAIN GAUGE Crochet hook, size 3.50 mm (E-4)

GAUGE
22 sts = 4”; 26 rows = 4” in St st
TO SAVE TIME, TAKE TIME TO CHECK GAUGE


BACK
With straight needles, cast on 132(144-154- 166-176-188) sts. Work even in St st for 4 rows, end on WS.
Dec Row (RS): K1, k2 tog, k to last 3 sts, SSK, k1 – 130(142-152-164-174-186) sts. Rep this dec every 2nd row 6(6-5-5-3-3) times more, then every 4th row 15(15-16-16-18-18) times – 88(100- 110-122-132-144) sts. Work even until piece measures 12½(12½-13-13-13½-13½)” from beg, end on WS.

Shape Armholes: Bind off 4(6-7-8-10-10) sts at beg of the next 2 rows, then 0(4-4-4-4-4) sts at beg of next 2 rows – 80(80-88-98-104-116) sts. Dec 1 st each side every RS row 7(7-8-10-
11-14) times – 66(66-72-78-82-88) sts. Work even until armholes measure 5½(5½-6-6½- 6½-7)”, end on WS.

Shape Neck: Next Row (RS): K14, join another hank of yarn and bind off center 38(38- 44-50-54-60) sts, k to end. Working both sides at once, dec 1 st at each neck edge EVERY row 13 times. Fasten off last st each side.

LEFT FRONT
With straight needles, cast on 3 sts. Knit 1 row, purl 1 row.
Inc Row (RS): K1, M1k, k to end – 4 sts. Rep this inc every RS row 42(36-40-37-40-37) times more, end on WS – 46(40-44-41-44-41) sts.
Next Row (RS): Rep Inc Row once more – 47(41-45-42-45-42) sts.
Following Row (WS): P to last 2 sts, M1p, p2 – 48(42-46-43-46-43) sts. Rep these 2 rows 20(26-25-28-28-31) times more – 88(94-96-99-
102-105) sts. Work even if necessary until piece measures 20(20-21-21-22-22)” from beg, end on WS. Mark for beg of side seam. Work even for 4 rows, end on WS.
Dec Row (RS): K1, k2 tog, k to end – 87(93-95- 98-101-104) sts. Rep this dec every 2nd row 6(6-5-5-3-3) times more, then every 4th row
15(15-16-16-18-18) times – 66(72-74-77-80-83) sts. Work even until piece measures 12½(12½-13-13-13½-13½)” above marker, end on WS.

Shape Armhole: Bind off 4(6-7-8-10-10) sts at beg of the next row, then 0 (4-4-4-4-4) sts at beg of next RS row – 62(62-63-65-66-69) sts. Dec 1 st at armhole edge every RS row 7(7-8- 10-11-14) times – 55 sts. Work even until armhole measures 7½(7½-8-8½-8½-9)”, end on WS. Mark end of last row for beg of collar. Work even until collar measures 6(6-6½-7-7½-8)” above marker, end on WS. Bind off.

RIGHT FRONT
Work to correspond to left front, reversing all shaping. Work side incs at end of RS rows and at beg of WS rows. Bind off for armhole on WS. Work armhole decs at end of RS rows.

SLEEVES
With straight needles, cast on 66(66-72-78-82- 88) sts. Work even in St st for 1”, end on WS.

Shape Cap: Bind off 4(6-7-8-10-10) sts at beg of the next 2 rows, then 0(4-4-4-4-4) sts at beg of next 2 rows – 58(46-50-54-54-60) sts. Dec 1 st each side every 4th row 0(5-5-6-6-6) times,
then every RS row 14(3-3-1-1-1) times, end on WS – 22(22-26-32-32-3630(30-34-40-40-46) sts.
Bind off 43 sts at beg of the next 2(2-4-4-4-4) rows, then 4 sts at the beg of next 2(2-0-0-0-0).
Bind off remaining 16(16-22-28-28-34) sts.

FINISHING
Sew bound-off edges of left and right collar tog. Sew inner edge of collar to back neck edge with seam in center, matching markers with finished-off st on each side. Sew in sleeves. Sew side and sleeve seams.

Left Lower Edging: With RS facing, using crochet hook, beg at left side seam, work in sc to cast-on edge of left front. DO NOT turn. Work from left to right in Reverse sc back to side seam. Fasten off.

Right Lower Edging: Beg at cast-on edge of right front, work same as left lower edging.

Saturday, June 26, 2010

Strasbourg Vest

This vest pattern is extremely versatile, you can wear it many ways by adjusting the ties.


YARN
Naturally Caron.com Country (75% Microdenier Acrylic/25% Merino Wool 3 oz/85 g, 185 yds/169 m skein):
Color #0018 Spice House:
8 (9, 10, 11, 13, 14)oz/226 (255, 283, 311, 368, 396)g
One circular size U.S. 7 (4.5mm) needle, 32"/81.5cm long or size to obtain gauge
One pair straight size U.S. 7 (4.5mm) needles
One pair size U.S. 6 (4mm) straight needles (for buttonband)
One crochet hook size U.S. G (4mm) (for ties)
Split ring stitch markers
4 stitch holders
Yarn needle 6 (6, 6, 7, 7, 7) buttons, ¾"/2cm diameter

SIZES
Small (Medium, Large, 1X, 2X, 3X).
FINISHED MEASUREMENTS
Bust (when buttoned): 36 (40, 44, 48, 52, 56)”/91.5 (101.5, 112, 122, 132, 142)cm
Length 14 (15, 16, 16 ½, 17, 17)"/35.5 (38, 40.5, 42, 43, 43)cm

GAUGE
In Stockinette stitch, using size U.S. 7 (4.5mm) needle, 18 sts and 24 rows = 4”/10cm

STITCHES USED
Stockinette Stitch (St st):
Knit RS rows and purl WS rows.
Seed Stitch (Seed st):
Row 1: (K1, p1) across, ending with k1 if there are an odd number of sts.
Row 2: Knit the purl sts and purl the knit sts (as they face you).
Rep Row 2 for Seed st.
SPECIAL TERMS
To increase, knit 1 in stitch below.
NOTES
Garment is worked back and forth on circular needle.
Garment starts with the collar band, knitted horizontally.
Stitches for the body are then picked up along the Collar Band in three sections (two fronts and back), worked separately down toward bottom of armhole, then joined after completion of armhole and worked in one piece down to hem.
The top widths of the back and fronts on the two largest sizes may appear too big when flat, however they will gather appropriately when worn fully closed.

VEST
Collar Band
With large circular needle, CO 15 sts. Do not join.
Row 1 (WS): K.
Row 2 (RS): P.
Rows 3-4: Rep Rows 1-2.
Row 5: Rep Row 1.
Row 6: K4, yo, k2tog, k3, k2tog, yo, k4.
Row 7: P.
Row 8: K.
Row 9: P.
Row 10: Rep Row 6.
Rep Rows 1-10 until 400 (410, 420, 430, 440, 440) rows completed. Rep Rows 1-4 once more. BO all sts.

Body
Note: There are 81 (83, 85, 87, 89, 89) five-row sections (including the BO row) in the collar band. Mark sections along one long side of the collar band to begin picking up sts for the body as follows:
Count 13 (14, 14, 15, 15, 15) five-row sections across for first front, pm (place marker), count 15 five-row sections across for armhole, pm, count 25 (25, 27, 27, 29, 29) five-row sections across for back, pm, count 15 five-row sections across for armhole, pm, there are 13 (14, 14, 15, 15, 15) five-row sections remaining for second front.

First Front
Row 1: With larger straight needles and RS facing, pick up 32 (35, 37, 39, 42, 46) sts evenly to first marker.
Row 2 (WS): K3, p across.
Row 3 (RS): K.
Rep Rows 2-3 until piece measures 5 ½ (6, 6, 5 ½, 6, 6 ½)” from top of collar band, ending with a RS row.
Next row (WS): K3, p across.
Next row (RS): K to last 3 sts, inc 1, k3—33 (36, 38, 40, 43, 47)sts.
Next row: K3, p across.
Rep last 2 rows 3 (3, 5, 7, 7, 7) times more—36 (39, 43, 47, 50,54) sts.
Next row: K. Place sts on holder.

Back
Row 1: With larger straight needles and RS facing, pick up 63 (71, 77, 79, 84, 94) sts evenly between 2nd and 3rd markers.
Row 2 (WS): K3, p across to last 3 sts, k3.
Row 3 (RS): K.
Rep rows 2-3 until piece measures 5 ½ (6, 6, 5 ½, 6, 6 ½)” from top of collar band, ending with a RS row.
Next row (WS): K3, p across to last 3 sts, k3.
Next row (RS): K3, inc 1, k to last 3 sts, inc 1, k3—65 (73, 79,81, 86, 96) sts.
Next row: K3, p across to last 3 sts, k3.
Rep last 2 rows 3 (3, 5, 7, 7, 7) times more—71 (79, 89, 95, 100, 110) sts.
Next row: K across. Place sts on holder.

Second Front
Row 1: With larger straight needles and RS facing, pick up 32 (35, 37, 39, 42, 46) sts evenly after 4th marker.
Row 2 (WS): P across to last 3 sts, k3.
Row 3 (RS): K.
Rep Rows 2-3 until piece measures 5 ½ (6, 6, 5 ½, 6, 6 ½)” from top of collar band, ending with a RS row.
Next row (WS): P across to last 3 sts, k3.
Next row (RS): K3, inc 1, k across—33 (36, 38, 40, 43, 47) sts.
Next row: P across to last 3 sts, k3.
Rep last 2 rows 3 (3, 5, 7, 7, 7) times more—36 (39, 43, 47, 50,54) sts.
Next row (RS): K.

Joining
Row 1 (WS): With circular needle, p across second front sts to last 3 sts, pm, k3, CO 8 (10, 10, 12, 16, 17) sts for underarm; working into sts from Back holder, k3, pm, p across to last 3 sts, pm, k3; CO 8 (10, 10, 12, 16, 17) sts for underarm, working into sts from last holder (first front), k3, pm, p across—159 (177, 195, 213, 232, 252) sts.
Row 2 (RS): K across slipping markers.
Row 3: P to next marker, remove marker; rep from * across all markers, p to end.
Work in St st until piece measures 13 (14, 15, 15 ½, 16, 16)” from top of Collar Band.
Work in Seed st until piece measures 14 (15, 16, 16 ½, 17, 17)” from top of Collar Band. BO in knit.

Left Front Button Band
With smaller straight needles and RS facing, pick up sts evenly along Left Front straight edge. Take note of the number of sts to ensure that the same number of sts is picked up when working on the Right Front.
Rows 1-7: Work in Seed st.
BO in knit.

Right Front Button Band
With smaller needles and RS facing, pick up same number of sts evenly along Right Front straight edge.
Rows 1-3: Work in Seed st.
Mark 6 (6, 6, 7, 7, 7) buttonhole positions evenly spaced along button band.
Row 4 (Note: In order to maintain Seed st, buttonhole is always worked after a k st as it is placed in patt).Work in across in Seed st, except working [yo, k2tog] at each buttonhole position.
Rows 5-7: Work in Seed st.
BO in knit.

Ties (make 2)
With crochet hook, *ch 1, sc in back horizontal bar of ch, rep from * until tie measures 47 (50, 51, 52, 54, 55)". Fasten off. Weave ties in open spaces on Collar Band, leaving sufficient length at each end to fasten as desired.

FINISHING
Sew buttons to Left Front opposite buttonholes.
Using yarn needle, weave in ends.


Designed by Kim Guzman.

Wednesday, January 6, 2010

Chunky Yarn Vest & Hat

I completed a chunky yarn vest and hat with Schaefer Elaine Yarn and here are the results:


knitqwik projects slideshow