With cables and moss stitch for great texture, you can wear this piece as a scarf, hood, or a gaiter/cowl for three different looks in one piece! 
SIZE: One Size
About 16 x 60 in. (40.5 x 152.5 cm)
MATERIALS
• 860-135 Lion Brand Vanna's Choice Yarn: Rust 4 Balls
• Stitch Markers
• Cable Needles (Set of 2)
• Large-Eye Blunt Needles
• Knitting Needles- Size 8 [5 mm]
• Additional Materials
2 buttons, 1 in. (25 mm) diameter
GAUGE:
17 sts + 21 rows = about 4 in. (10 cm) over pattern. BE SURE TO CHECK YOUR GAUGE.
When you match the gauge in a pattern, your project will be the size specified in the pattern and the materials specified in the pattern will be sufficient. If it takes you less stitches and rows to make a 4 in. [10 cm] square, try using a smaller size hook or needles;
if more stitches and rows, try a larger size hook or needles.
STITCH EXPLANATION:
Kfb (knit in front and back) Knit next st without removing it from left needle, then k through back of same st - 1 st increased.
2/2 LPC (2 over 2 left purl cross): Slip 2 sts to cable needle and hold in front, p2, then k2 from cable needle.
2/2 RPC (2 over 2 right purl cross): Slip 2 sts to cable needle and hold in back, k2, then p2 from cable needle.
2/1 LPC (2 over 1 left purl cross): Slip 2 sts to cable needle and hold in front, p1, then k2 from cable needle.
2/1 RPC (2 over 1 right purl cross): Slip 1 st to cable needle and hold in back, k2, then p1 from cable needle.
2/2 LC (2 over 2 left cross): Slip 2 sts to cable needle and hold in front, k2, then k2 from cable needle.

PATTERN STITCHES
K2, p2 Rib (multiple of 4 sts)
Row 1 (RS): *P2, k2; rep from * across.
Rep Row 1 for K2, p2 Rib.
Cable Pattern (over 28 sts)
Row 1: P2, 2/1 LPC, p18, 2/1 RPC, p2.
Row 2: K3, p2, k18, p2, k3.
Row 3: P3, 2/1 LPC, p16, 2/1 RPC, p3.
Row 4: K4, p2, k16, p2, k4.
Row 5: P4, 2/1 LPC, p14, 2/1 RPC, p4.
Row 6: K5, p2, k14, p2, k5.
Row 7: P5, 2/1 LPC, p12, 2/1 RPC, p5.
Row 8: K6, p2, k12, p2, k6.
Row 9: P6, 2/2 LPC, p8, 2/2 RPC, p6.
Row 10: K8, p2, k8, p2, k8.
Row 11: P8, 2/2 LPC, p4, 2/2 RPC, p8.
Row 12: K10, p2, k4, p2, k10.
Row 13: P10, 2/2 LPC, 2/2 RPC, p10.
Row 14: K12, p4, k12.
Row 15: P12, 2/2 LC, p12.
Row 16: K12, p4, k12.
Row 17: P10, 2/2 RPC, 2/2 LPC, p10.
Row 18: K10, p2, k4, p2, k10.
Row 19: P8, 2/2 RPC, p4, 2/2 LPC, p8.
Row 20: K8, p2, k8, p2, k8.
Row 21: P6, 2/2 RPC, p8, 2/2 LPC, p6.
Row 22: K6, p2, k12, p2, k6.
Row 23: P5, 2/1 RPC, p12, 2/1 LPC, p5.
Row 24: K5, p2, k14, p2, k5.
Row 25: P4, 2/1 RPC, p14, 2/1 LPC, p4.
Row 26: K4, p2, k16, p2, k4.
Row 27: P3, 2/1 RPC, p16, 2/1 LPC, p3.
Row 28: K3, p2, k18, p2, k3.
Row 29: P2, 2/1 RPC, p18, 2/1 LPC, p2.
Row 30: K2, p2, k20, p2, k2.
Row 31: P2, k2, p20, k2, p2.
Row 32: K2, p2, k20, p2, k2.
Rep Rows 1-32 for Cable pattern.
Moss Stitch (multiple of 2 sts)
Rows 1 and 2: *K1, p1; rep from * across.
Rows 3 and 4: *P1, k1; rep from * across.
Rep Rows 1-4 for Moss st.
WRAP
Cast on 84 sts.
Work in K2, p2 Rib until piece measures about 3 in. (7.5 cm) from beg, end with a WS row.
Next Row (Decrease): K5, p1, k2tog, *(p1, k1) 4 times, p2tog, (k1, p1) 4 times, k2tog; rep from * once more,p3, k2, p3, p2tog, p8, p2tog, p7, k1, k2tog, p2, k4 - 76 sts at the end of this row.
Set-Up Row: K6, p2, k20, p2, k2, (p1, k1) 20 times, k4.
Next Row: K4 (for border), place marker (pm), work Row 1 of Moss st over next 40 sts, pm, work Row 1 of Cable pattern over next 28 sts, pm, k4 (for border).
Next Row: Work in Garter st (k every row) to first marker, slip marker (sm), work Row 2 of Cable pattern over next 28 sts, sm, work next row of Moss st over next 40 sts, sm, work in Garter st over last 4 sts.
Continue in pattern sts as established, keeping first and last 4 sts in Garter st for border, until Rows 1-32 of Cable pattern have been worked 8 times.
Note: Piece should measure about 51 in. (129.5 cm) from beg.
Buttonhole Row (RS): K4, work in patterns as established to last 4 sts, k1, yarn over, k2tog (buttonhole made),
k1.
Continue in patterns as established for 25 more rows, then rep Buttonhole Row.
Continue in patterns as established until Row 30 of Cable pattern has been completed, thus ending with a WS row.
Next Row (Increase): K2, p2, k2, kfb, *(k2, p2) twice, kfb, (p2, k2) twice, kfb; rep from * 2 more times, (k2, p2)
twice, kfb, p2, k2, p2 - 84 sts at the end of this row.
Work in K2, p2 Rib for about 3 in. (7.5 cm).
Bind off.
FINISHING
Sew buttons along same side edge as buttonholes, but at beginning (cast on) end of Scarf. Weave in ends.
 Light, easy and breezy...a great transition shawl.


 SIZE: One Size
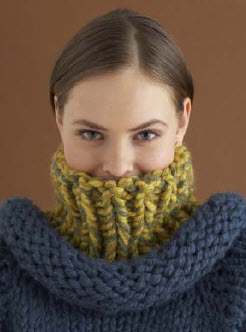


 Materials:


 Dress up that little summer dress with this adorable knitted rose choker using the incredible Tilli Tomas Yarns.


